
Company location metafield trigger
Start a Shopify Flow workflow when a company location metafield changes. Track it in Workflow Trigger Extensions and get the old and the new value.
A B2B customer has several branches, and each one accepts deliveries at other hours. The hours are kept in the company location metafield Delivery window (custom.delivery_window), and logistics must hear about a change before the next shipment is planned.
This page shows how to start a Shopify Flow workflow whenever a metafield of a company location changes, with Workflow Trigger Extensions. The steps are the same for every metafield of this resource type; the example uses Delivery window (custom.delivery_window).
What you need
- A metafield definition. Create it in your Shopify admin under Settings > Metafields and metaobjects > Company locations. A metafield without a definition cannot be tracked.
- The permission Company & Company Location Data Access (B2B). Grant it on the app's Permissions page, see Permissions and data access.
- Company locations are part of B2B on Shopify. The resource type is only useful on a store that has companies.
1. Track the metafield
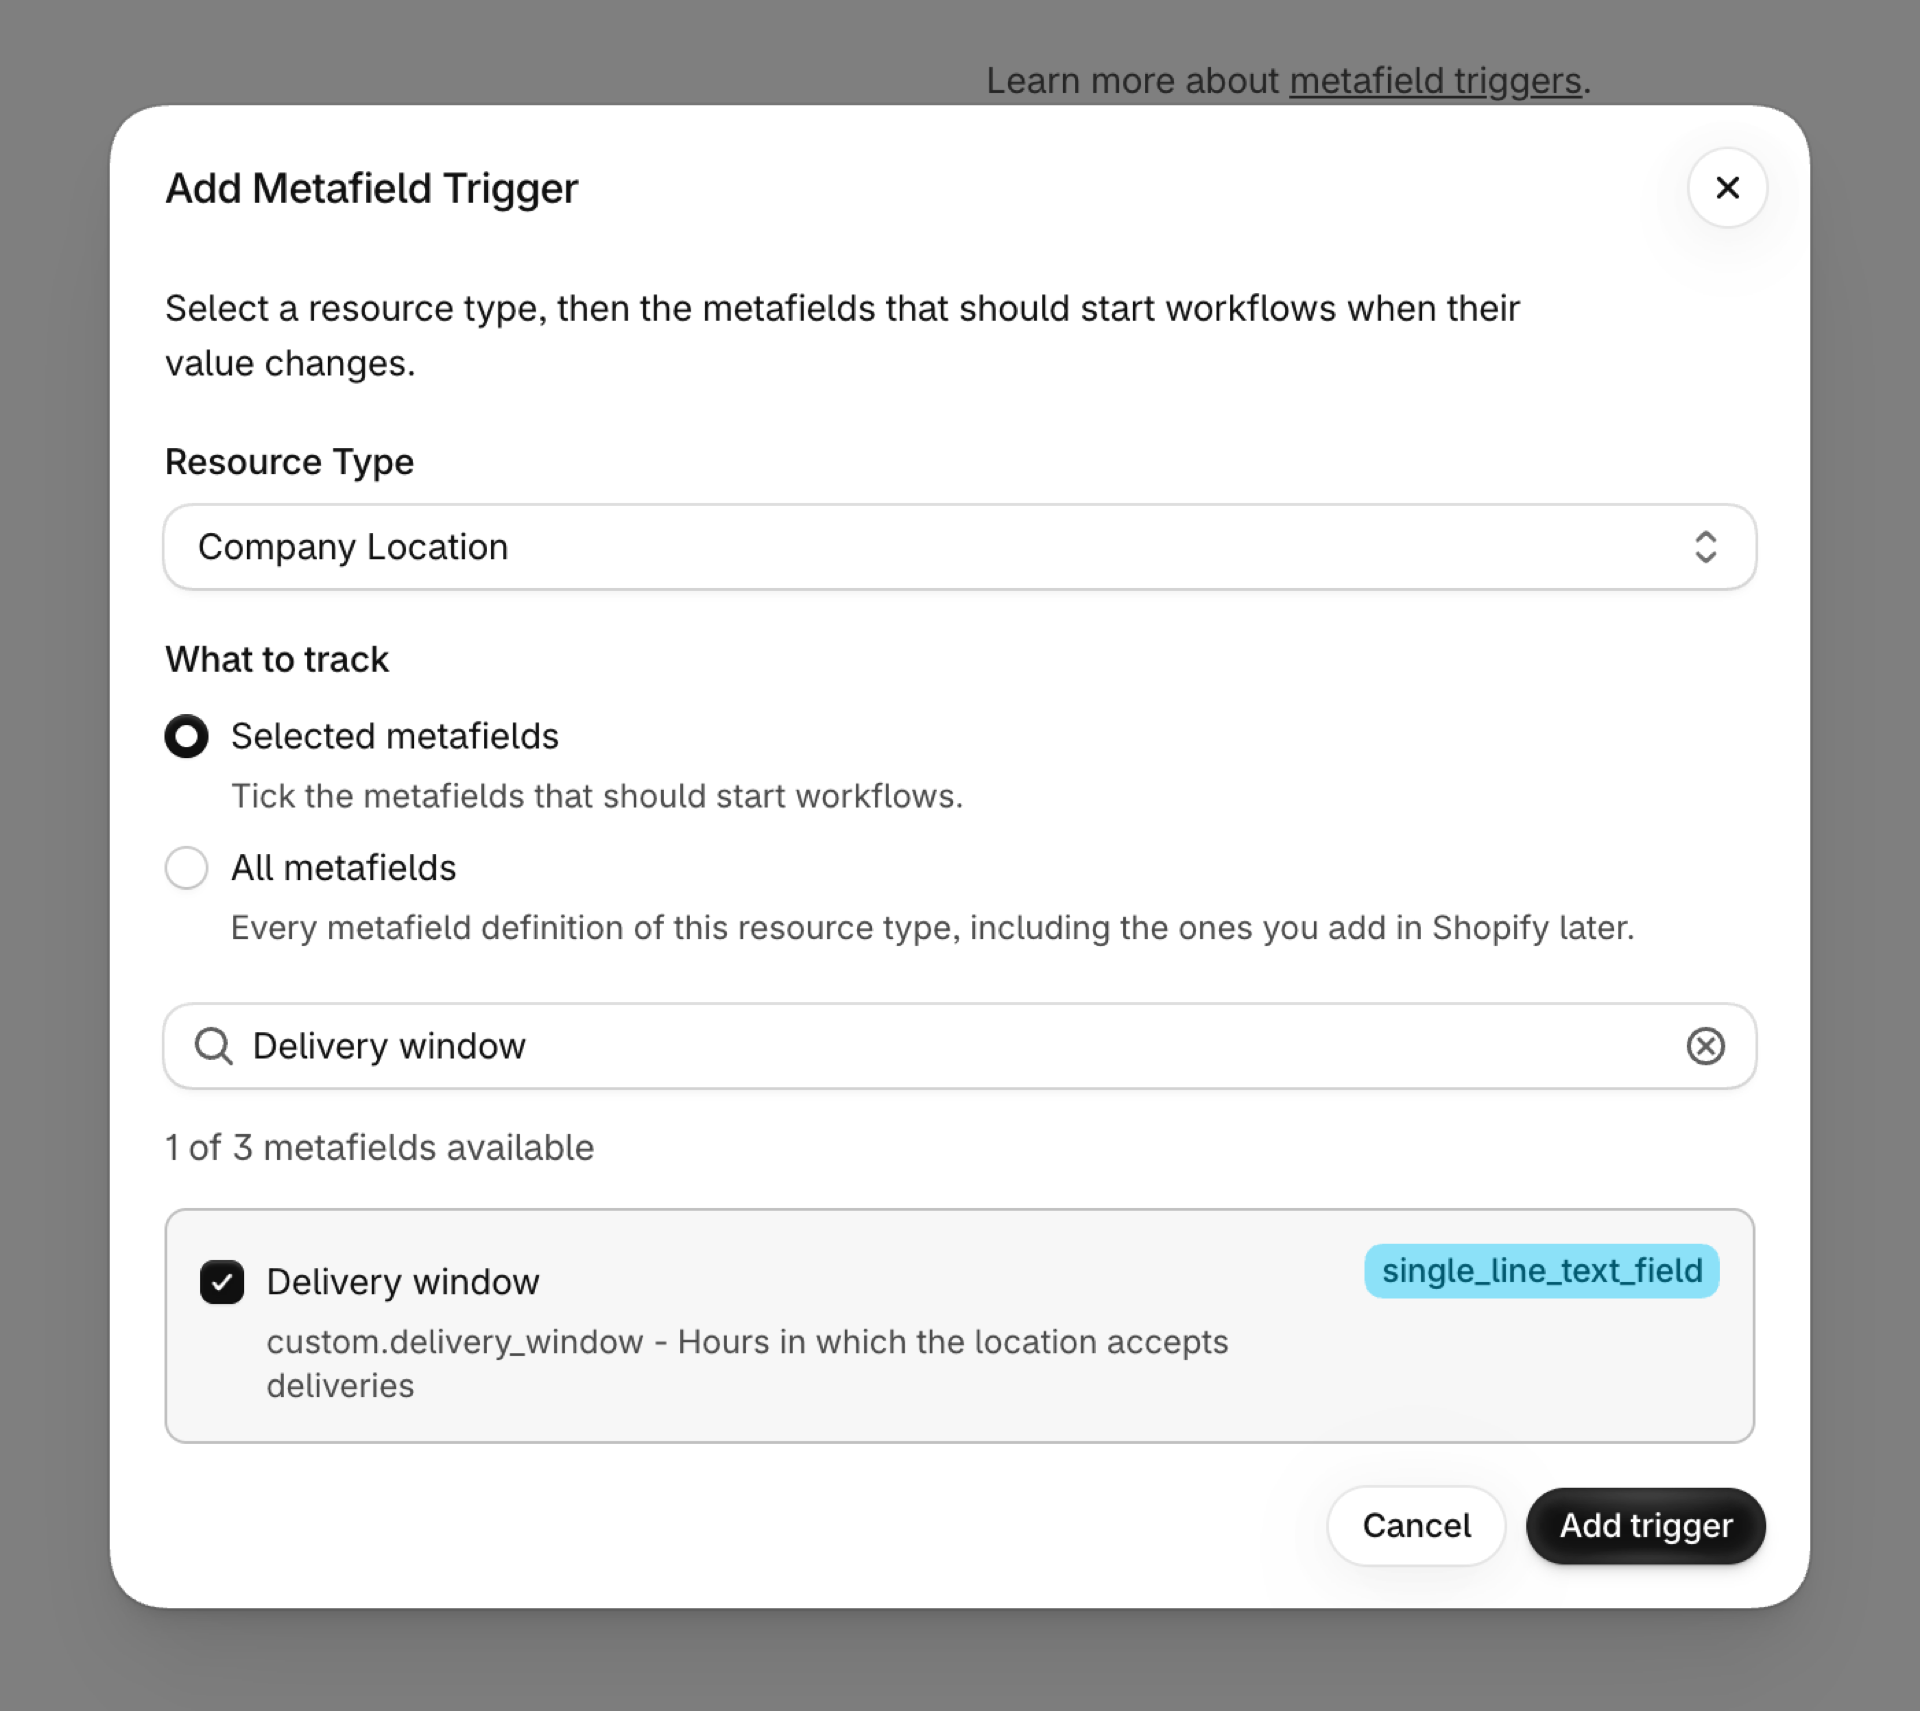
- Open Metafield Triggers in the app and click Add trigger.
- Choose the resource type Company Location.
- Tick the metafield, here Delivery window. You can tick several at once or use Select all.
- Click Add trigger.
To track every metafield of this resource type, including the ones you create later, choose All metafields instead of ticking single ones, then click Track all metafields.
The new trigger shows Initializing while the app reads the current value of the metafield on your existing company locations, then Active. That first reading is why the very first change already arrives with the right previous value.
If the metafield is missing from the list, click Refresh Metafields on the Metafield Triggers page: the app remembers the list of definitions for an hour.
2. What the workflow receives
Every change starts the trigger Metafield Update in Shopify Flow with these values:
| Variable | Value |
|---|---|
resourceType |
COMPANYLOCATION |
resourceId |
The ID of the company location, for example gid://shopify/CompanyLocation/1234567890 |
metafieldKey |
Namespace and key, here custom.delivery_window |
metafield.value |
The new value |
metafield.previousValue |
The value before the change, empty when the metafield was set for the first time |
metafield.type |
The type of the metafield, for example single_line_text_field |
3. Build the workflow
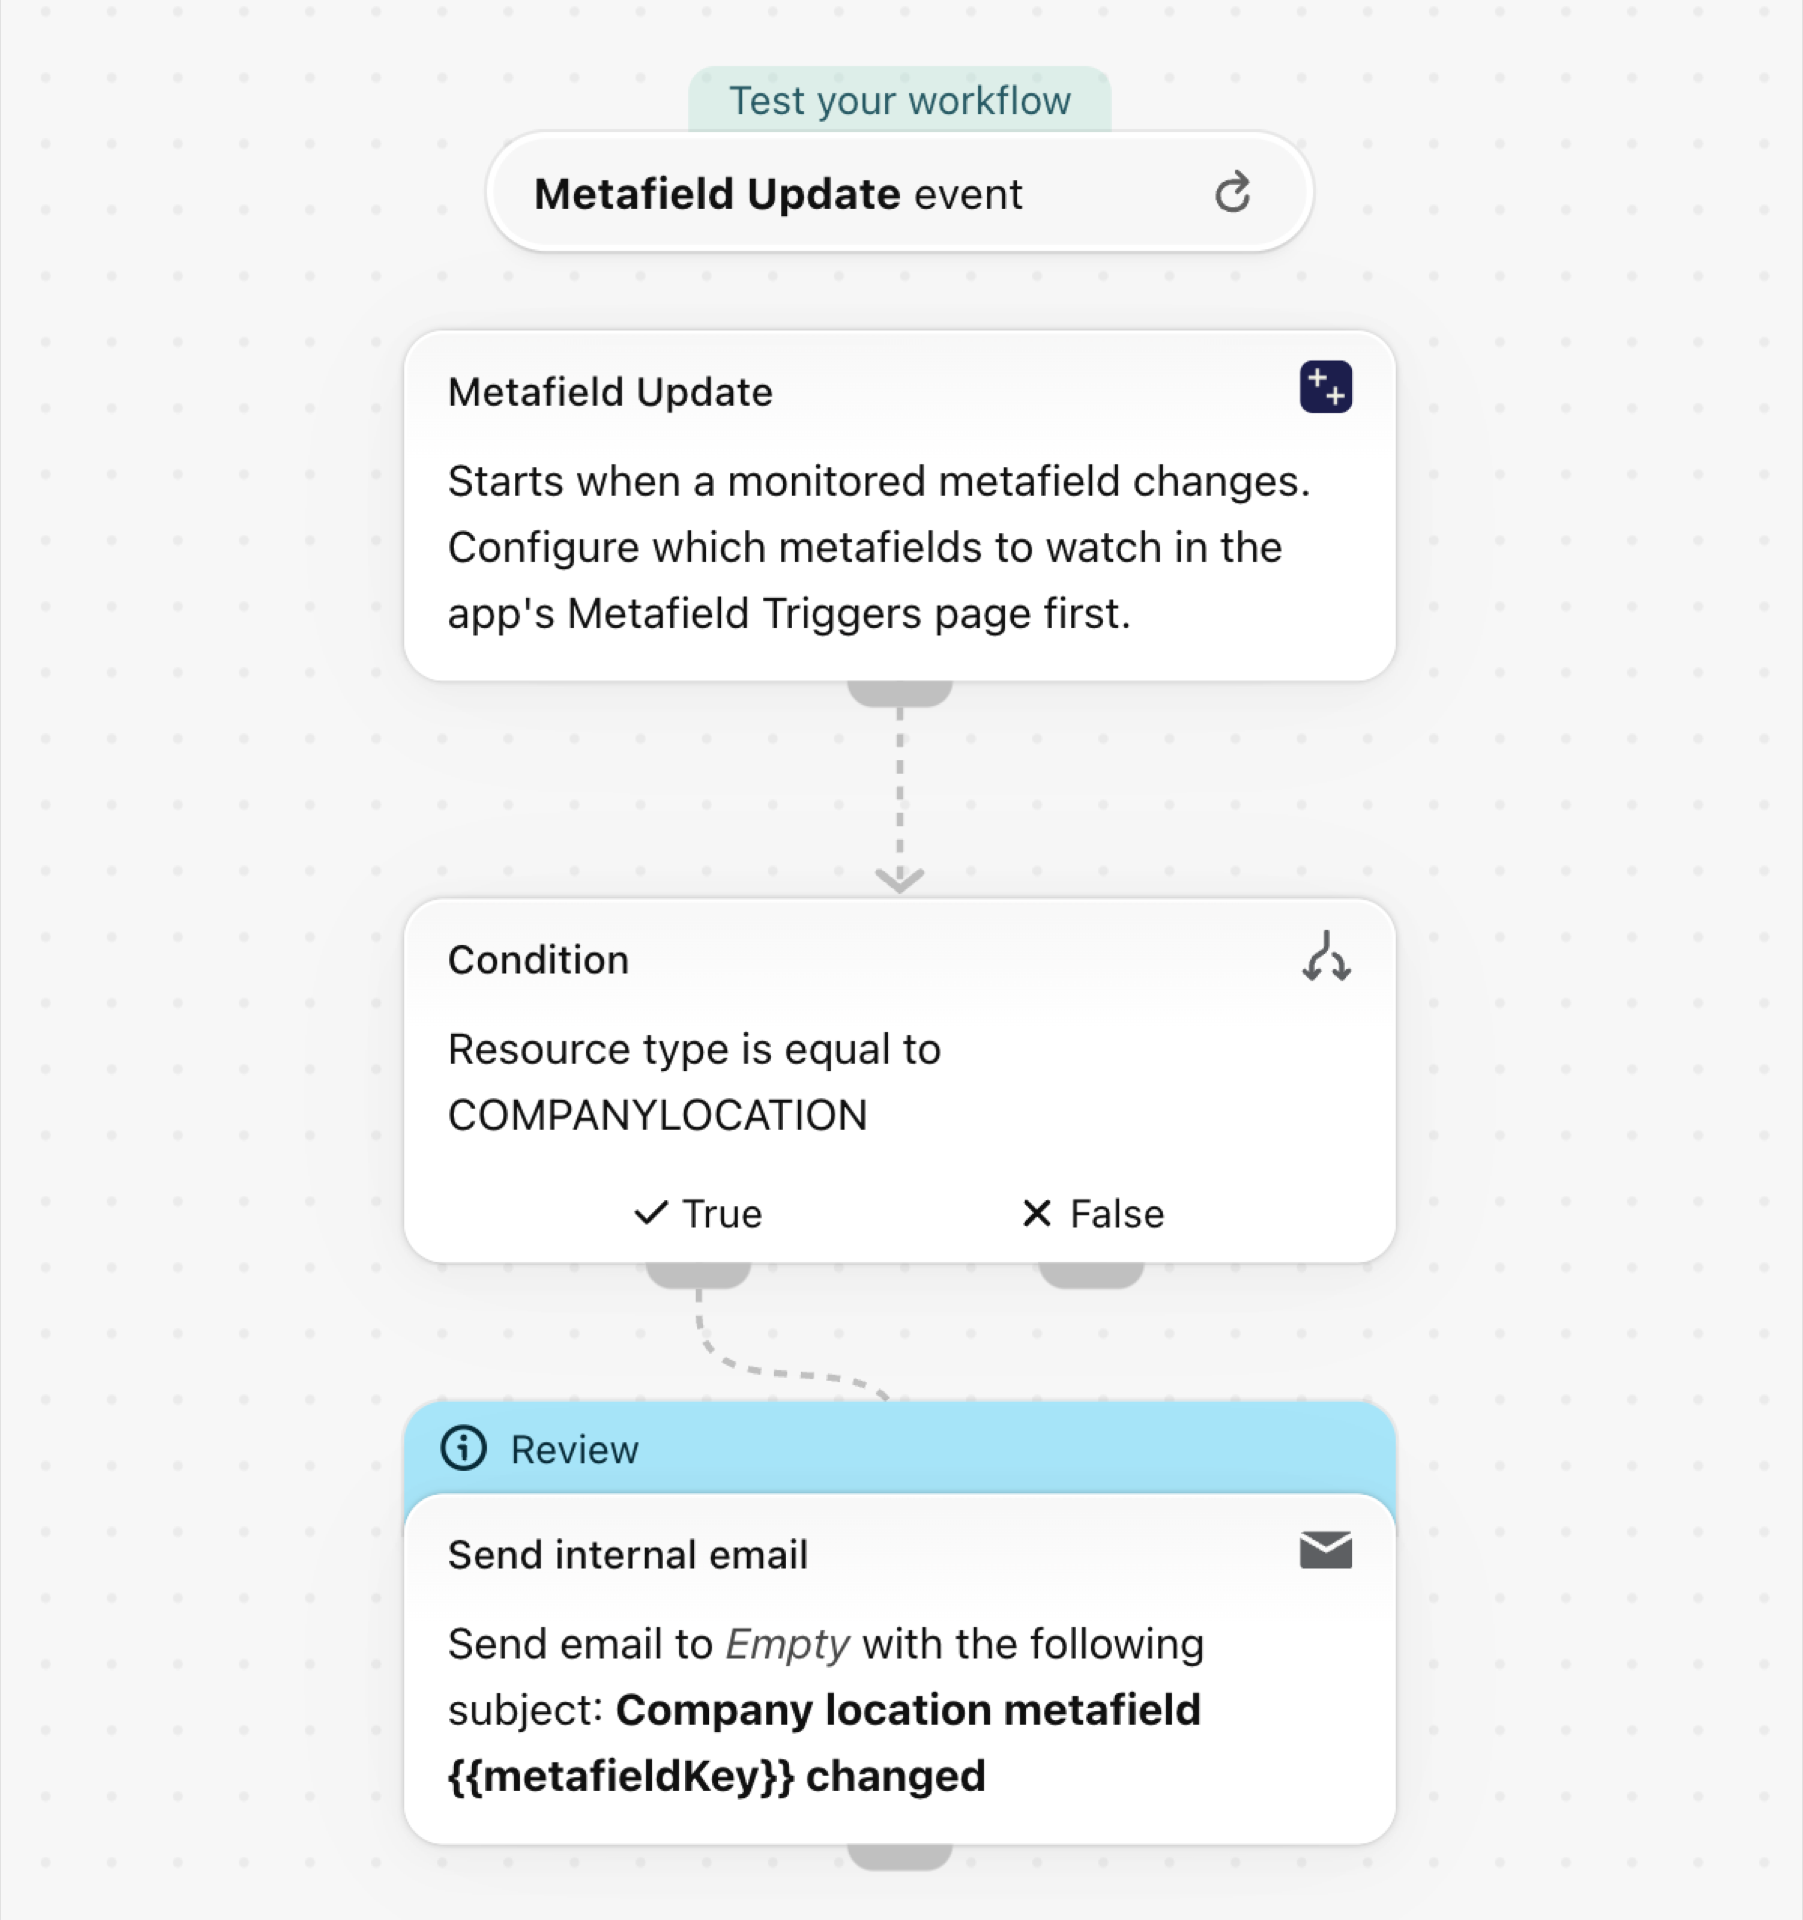
- In Shopify Flow, create a workflow and choose the trigger Metafield Update of Workflow Trigger Extensions.
- Add a Condition:
resourceTypeis equal toCOMPANYLOCATION. Metafield Update starts for every resource type you track, so the condition keeps this workflow to company locations. When you track several metafields of the type, addmetafieldKeyis equal tocustom.delivery_windowas a second criterion. - Add the action you need. The example sends an internal email with the old and the new value.
Start from the example
- Download the
.flowfile attached at the bottom of this page. - In your Shopify admin open Flow, click Import and choose the file.
- Open the Send internal email step and enter the recipient. The file holds no address on purpose.
- Turn the workflow on.
Make it yours
- Send the new window to your carrier or planning tool with Send HTTP request.
- Add a condition on
metafieldKeywhen you track several company location metafields. - Keep the old value in the email with
metafield.previousValue, so nobody has to look it up.
How fast it reacts
Shopify notifies the app when a company location is saved. For a change that touches nothing but a metafield it sometimes sends no notification, so the app also checks your company locations about once a minute. Expect the workflow within seconds, and after a minute or two at the latest.
More
- Metafield triggers: how metafield triggers work, for every resource type.
- Event history and troubleshooting: see every event the app sent, with the old and the new value.